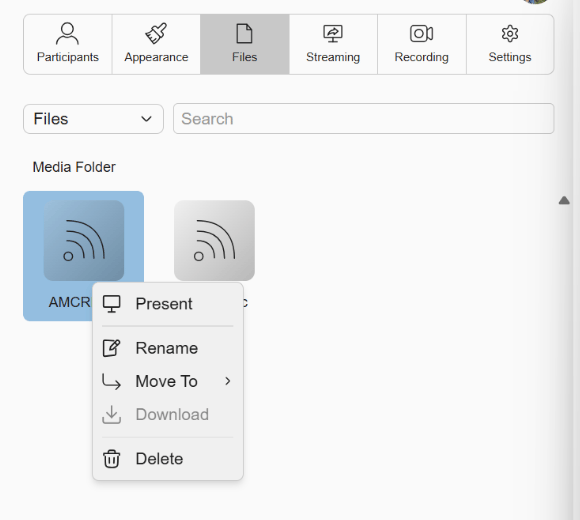
These steps were tested with a Windows 11 computer on the same local network as the camera, but the AMCREST configuration steps should also work from macOS. Any device with a browser can be used for the Coresee-side setup.
Set up your Coresee Room
Host / Co-Host Before configuring the camera, create an Inbound Feed in your Coresee Room to get the RTMP details the camera will stream to.1
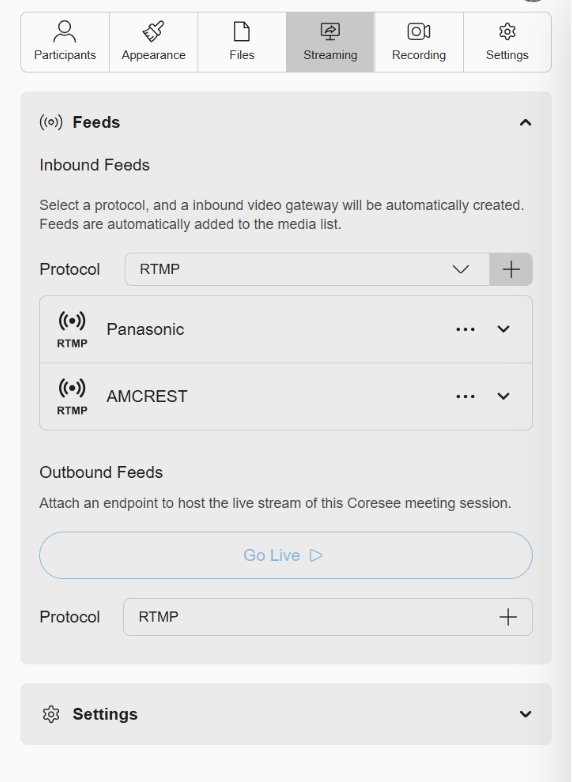
Open the Side Panel Streaming Tab
2
Create a new Inbound feed using the RTMP protocol.
3
Copy the RTMP Server URL and Channel ID
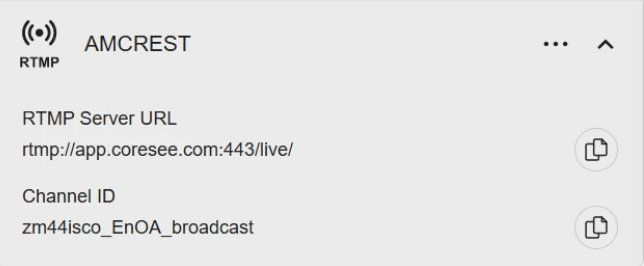
Your feed is now ready to be presented. Once the AMCREST camera is configured to push video to this RTMP destination, its feed will appear in the room automatically.
Initialize the AMCREST device
Before the camera can stream to Coresee, it needs to be powered on, discovered on your network, and given a system time. These steps follow AMCREST’s own device initialization instructions, included in the Quick Start Guide that ships with the camera, and were verified on Windows 11.1
Power on the camera
Power the AMCREST device via PoE (Power over Ethernet) or a power cable, and make sure it’s on the same network as the computer you’ll use to configure it.
2
Install the Amcrest IP Config tool
Download and install **Amcrest IP Config **for your operating system from amcrest.com/downloads.
3
Locate the camera
Launch Amcrest IP Config — the camera should appear in the device list. If it doesn’t appear, confirm it’s powered on, or click **Settings **in the top right to configure the correct subnet for discovery.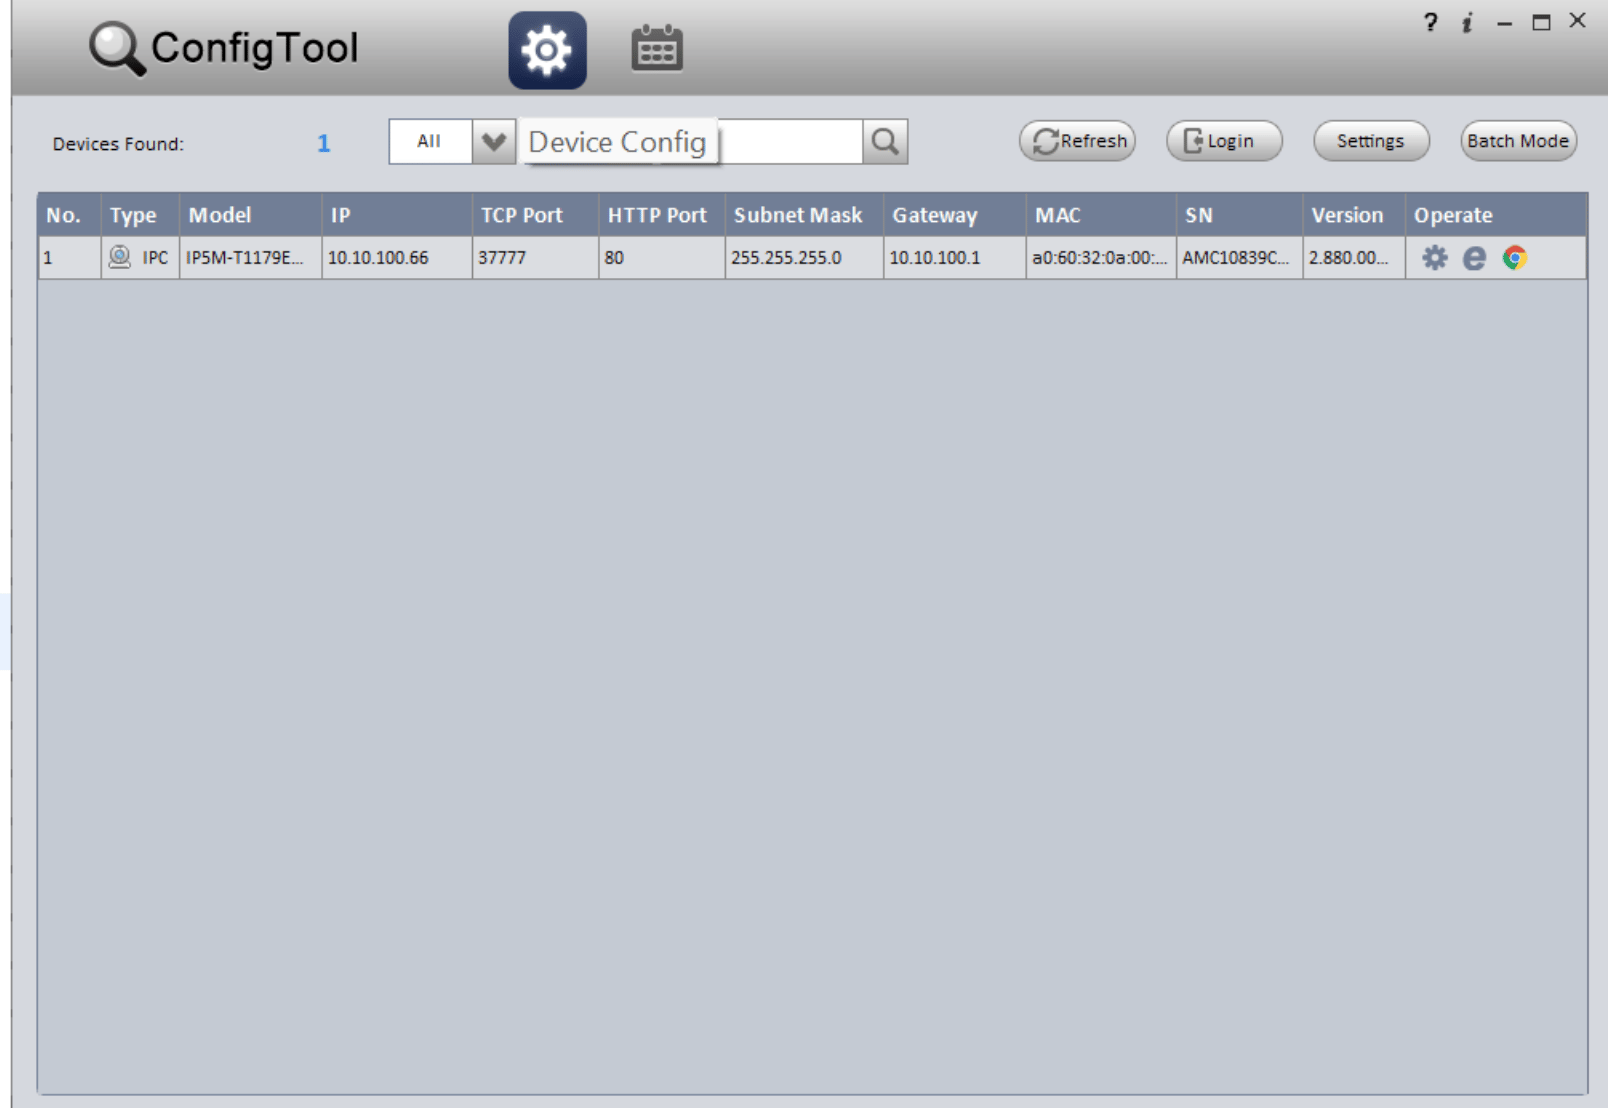
4
Log in to the camera
Click the gear icon to configure the device. This logs in using the camera’s default credentials (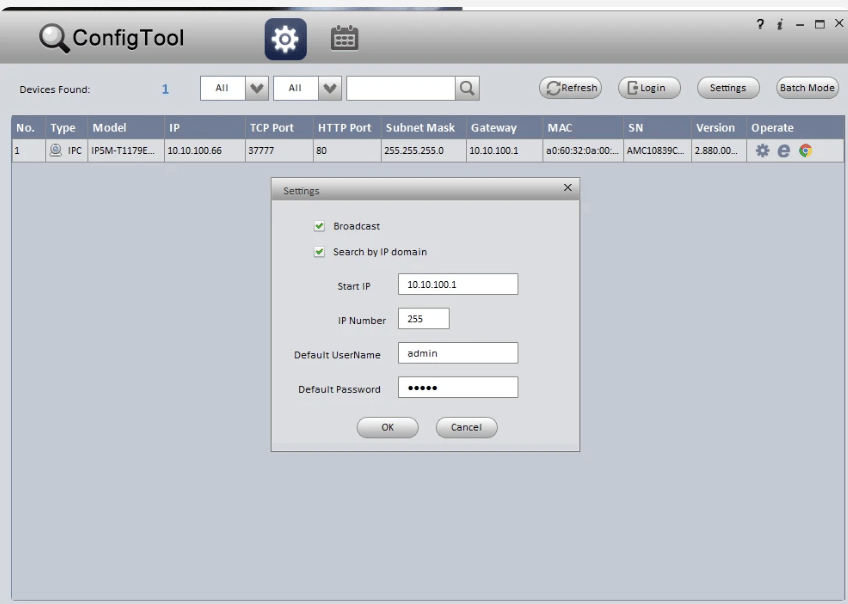
admin / admin).5
Set the camera's system time
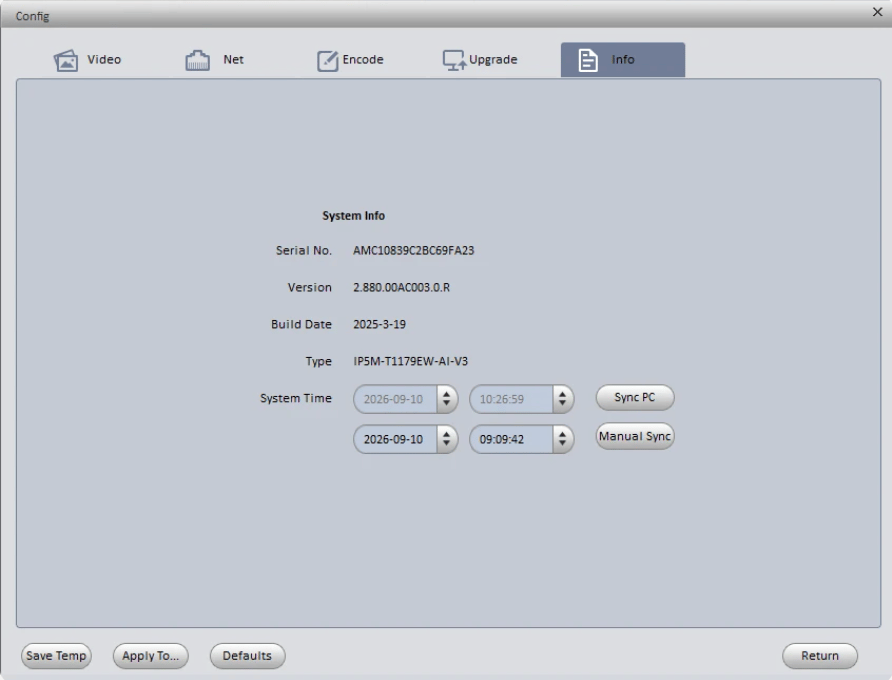
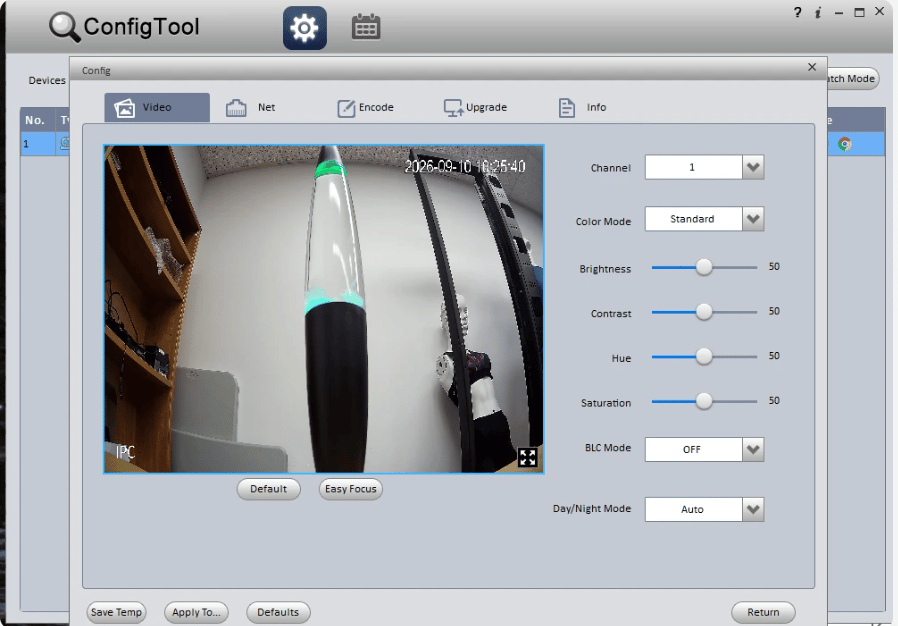
The camera is initialized. It’s now ready to be configured for RTMP streaming.
Configure the RTMP stream
With the camera initialized, the last step is to point its RTMP output at the Inbound Feed you created in your Coresee Room. This section was tested using a Windows 11 computer on the same network as the camera, using Google Chrome — but any browser should work.1
Open the camera's config page
In your browser, navigate directly to the camera’s IP address (for example,
http://10.10.100.66/).2
Set a new password
You’ll be prompted to change the default password, updating the credentials from
admin / admin to admin / your new password. This gives you access to the camera’s configuration pages.3
Enter the Coresee RTMP details
Go to Setup → Network → Connection → RTMP, set the address type to Customized, and enter your Coresee Inbound Feed’s RTMP Server URL and Channel ID. The full address should look like: 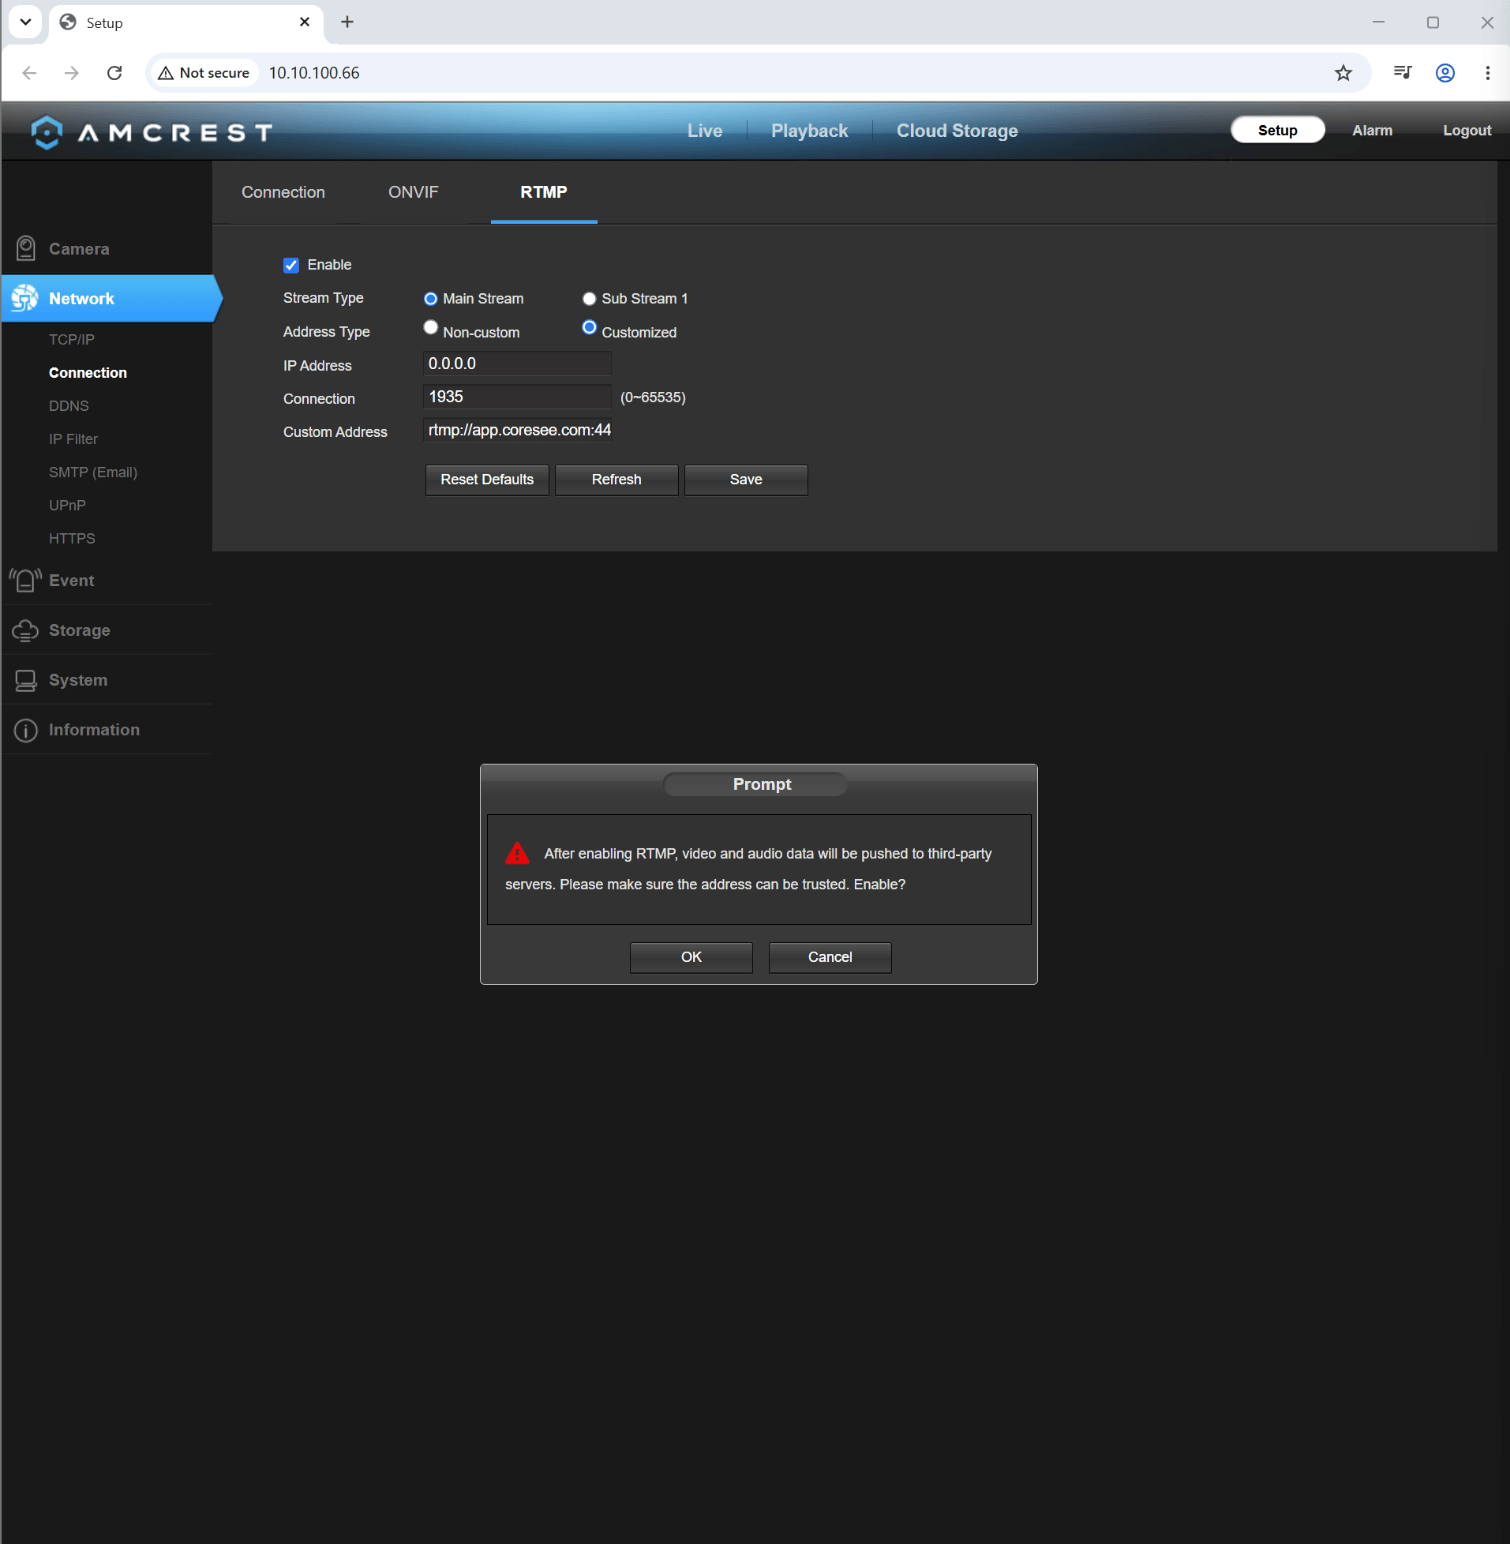
rtmp://app.coresee.com:443/live/yourroom_aabb_broadcast.4
Enable and save
Check Enable, click Save, then confirm the prompt.The camera’s feed should now be accessible in your Coresee Room.
If the feed doesn’t appear in the room after enabling, double-check that the Server URL and Channel ID were entered exactly as copied from the Coresee Side Panel, with no extra spaces.