Starting an ISO Recording
1
Open the Recording tab in the Side Panel
2
Turn on the ISO Recording toggle
3
Use the participant selector to choose which participants you want recorded individually
You can select one, several, or all eligible participants.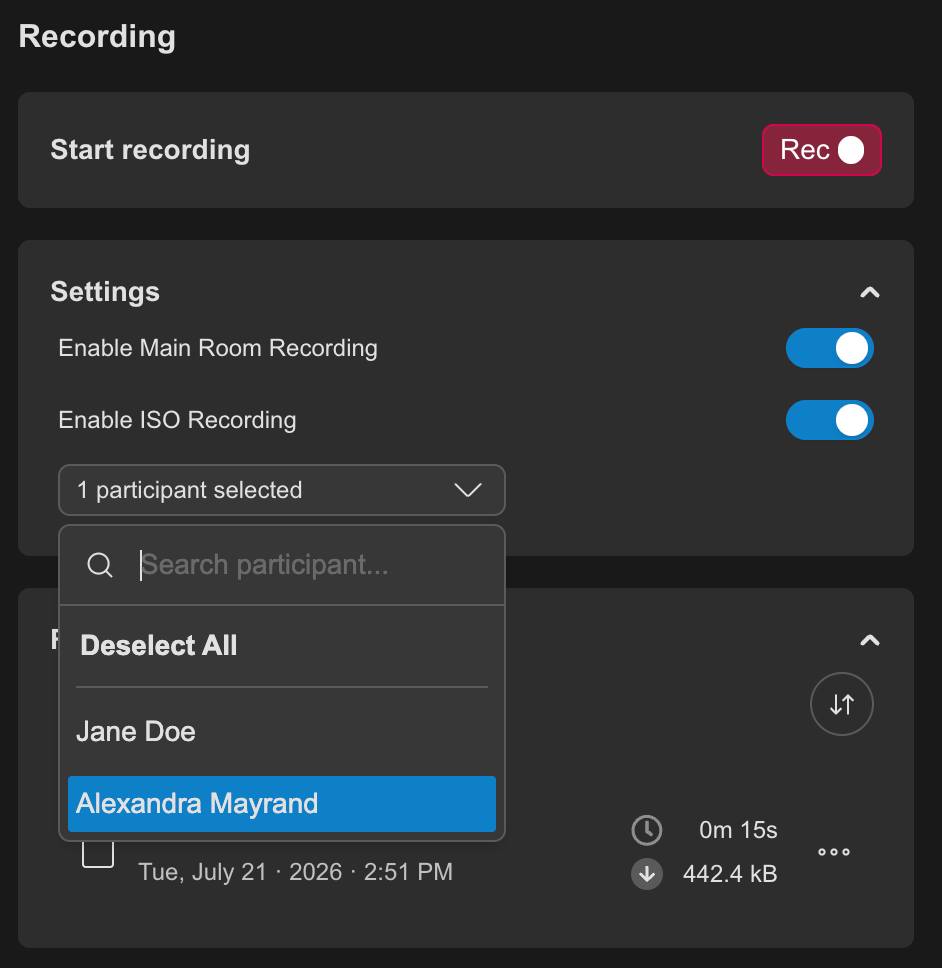
4
Click REC to start the recording
You must select at least one participant. The ISO toggle can’t be turned on with an empty selection. If you clear the selection while ISO recording is active, the toggle turns itself off.
How It Records & Uploads
ISO recording doesn’t stream straight to the cloud. Each participant’s track is recorded locally on their own device first, then uploaded to Coresee in the background as the session continues. Why record locally first? Recording locally keeps frame rate and quality consistent, regardless of what’s happening to that participant’s network connection during the call. If the upload happened live, a dip in bandwidth could show up as dropped frames or quality drops in the final file. Recording locally and uploading afterward avoids that — the file you get back reflects the participant’s real camera and mic, not their live connection quality. As the recording runs, it’s broken into chunks. Those chunks upload to the cloud continuously, at a pace that depends on that participant’s upload bandwidth.Staying Until Upload Completes
Because the recording is stored locally and uploaded afterward, a recorded participant needs to stay in the room until every chunk has finished uploading to the cloud — not just until the recording is stopped.How long this takes varies a lot. It depends on the participant’s upload bandwidth and on how long the session was. A short session with good upload speed can finish almost immediately after recording stops. A long session with poor upload speed can take a while to fully upload — for example, someone on weak internet may need to stay in the room for some time after the recording ends before it’s safe for them to leave.
Is It Safe to Quit?
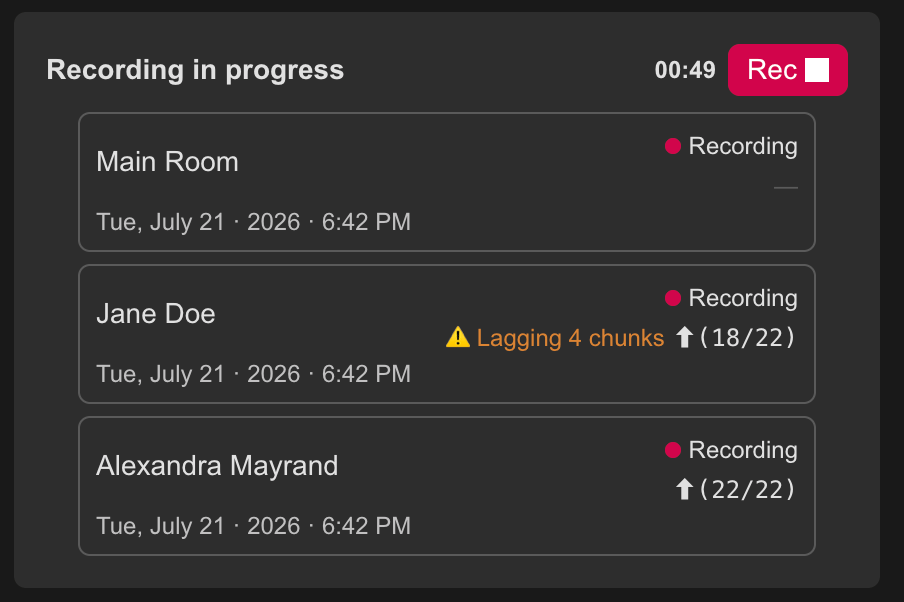
As the host, you can see exactly how much of each participant’s ISO recording has uploaded. While recording is active or catching up, the In Progress section of the Recording tab shows each ISO track with a chunk counter in the form x / total — where x is the number of chunks already uploaded to the cloud, and total is the full number of chunks recorded so far.